Showing posts with label Pies and Tarts. Show all posts

Monday, 18 May 2020

Vegan Peanut Caramel Chocolate Mousse Tart

vegan peanut caramel chocolate mousse tart


This recipe really got a thumbs up this weekend - sweet oaty coconut biscuit base, topped with a thin layer of peanut butter caramel and finished with a thick layer of dairy-free chocolate mousse. All vegan, all delicious!

Makes 1 20cm tart

Ingredients:
For the base:
  • 60g ground almonds
  • 20g plain flour
  • 30g desiccated coconut
  • 40g oats
  • 45g soft light brown sugar
  • pinch of salt
  • 1/4 tsp baking powder
  • 70g coconut oil
  • 1/2 tbsp golden syrup
For the peanut butter caramel:
  • 140g crunchy peanut butter (like Meridian)
  • 95g golden syrup
  • pinch of salt
For the chocolate mousse:
  • 250ml coconut cream, fridge cold
  • 20g cocoa powder
  • 30ml maple syrup (or golden syrup)

Method:

1. Make the base. Preheat the oven to 180c (160c fan)/gas mark 4. Grease the base of a 20cm fluted cake tin (loose-bottomed ideally!), and dust lightly with flour.

2. Mix together the ground almonds, flour, coconut, oats, brown sugar, salt and baking powder.

3. Melt the coconut oil, then mix in the golden syrup. Pour over the dry ingredients and bring the mixture together until it starts to clump together. 

4. Pour into the prepared cake tin and gently press into the corners of the tin, trying to get the biscuit as smooth as possible. Using the back of a spoon to press on the biscuit helps to get a smooth base.

5. Bake for around 10 minutes, or until starting to golden. Leave to cool completely.

6. For the peanut butter caramel, simply beat together the peanut butter, golden syrup and salt. 

7. For the chocolate mousse, pour the coconut cream, cocoa and maple/golden syrup into the bowl of a stand mixer with a whisk attachment. Whisk on medium speed for a few minutes until it has thickened and become fluffy.

8. Assemble the tart by spreading the peanut butter caramel onto the base of the tart. Cover with the mousse.

9. Place in the fridge for 3-4 hours, or until set.

10. Enjoy!

vegan peanut caramel chocolate mousse tart
Yum
Print This Recipe:

Tuesday, 3 March 2020

Vegan Salted Chocolate Caramel Nutty Tart

Vegan Chocolate Caramel Nutty Tart


I attempted this tart out last week, whilst recovering from the flu, and my partner ate half of the tart in a day - I took this as a good sign and have since made the tart again for my office :) Again, it was a big hit, so here's the recipe.
The first time I baked the tart I used a 23cm loose-bottomed tart tin, the second a 23cm square cake tin - both worked equally well (but the square tart was easier to slice for work!)

Makes one 23cm tart

Ingredients:

For the pastry:

  • 250g plain flour
  • 110g icing sugar
  • 110g soy margarine
  • Pinch of salt

For the filling:

  • 160g coconut cream
  • 200g light soft brown sugar
  • 1 & 1/2 tsp sea salt
  • 200g hazelnuts
  • 100g pecans
  • 100g vegan dark chocolate (Asda dark chocolate chips work very well)
  • 1 tsp vanilla extract

Method:

1. To make the pastry, sift together the plain flour and icing sugar and add a pinch of salt. Rub the margarine into the flour/sugar until the mixture resembles coarse breadcrumbs.

2. One tablespoon at a time, add cold water until the dough comes together into a ball. Wrap in cling film and chill for 30 minutes.

3. Grease a 23cm loose-bottomed tart or cake tin and line with baking parchment. Place a sheet of cling film on your surface, roughly 30cm long. Dust with a little flour, and then tip your dough onto the floured clingfilm.

4. If using a circular tin, roll the dough out until it is a rough 28cm circle. If using a square tin, roll the dough until it is a 28cm square. It should be 2-3cm thick.

5. Carefully transfer the pastry to the tin - this is easiest to do by picking up the clingfilm that is underneath the pastry, flipping this into the tin, and then removing the cling film. Patch up any holes with spare pastry and trim so that the sides are 1cm high.

6. Chill the pastry for 20 minutes.

7. Preheat your oven to 180c/gas mark 4. Prick the base of the dough all over with a fork, and then bake for 15 minutes or until the base has turned a light golden.

8. Whilst the pastry is baking, make the filling. Pour the coconut cream and brown sugar into a pan and place on a low heat. Bring to the boil and heat for around 5 minutes, or until the caramel has reduced and turned a deep brown.

9. Carefully pour in the salt, hazelnuts, pecans and dark chocolate, and stir until all of the chocolate has melted and all of the nuts are coated in the caramel. Add the vanilla and stir in.

10. Once the pastry is out of the oven, pour in the nutty caramel and bake for another 3 minutes. Leave to cool to room temperature, and then chill for an hour before slicing.

11. Enjoy!!

Vegan Chocolate Caramel Nutty Tart


Yum
Print This Recipe:

Sunday, 2 December 2018

Gingerbread Mince Pies

Gingerbread mince pie

It's nearly Christmas!!! Well, okay...not really, but it is now December, meaning I can make Christmas related bakes without feeling a bit silly.

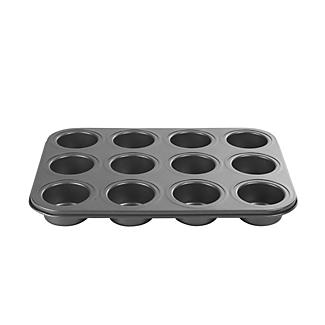
I made these yesterday (aka 1st December) and I know for sure I'll be making more batches in the run-up to Christmas - really simple mince pies, with a few twists. I use a special tin I bought from Lakeland, which is meant for making individual mini sandwich cakes - here is the link to the Lakeland page, and I've copied a picture of the tin below. I like using these as it means I can pack the pies full of mincemeat and keep the pastry nice and tin. You could instead use a deep muffin tin :)
My Kitchen 12 Cup Mini Sandwich Tin alt image 1
I spiced the pastry with ginger and cinnamon to give a gingerbread feel and added chopped satsuma and apple to the mincemeat (which was storebought, but you could make your own - here's my recipe from quite a few years ago now) to freshen it up.

This made 12 mince pies.

Ingredients:

For the pastry:

  • 380g (3 cups) plain flour
  • 90g (6 tbsp) icing sugar
  • 2/3 tsp salt
  • 1 tbsp ground ginger
  • 1 tbsp ground cinnamon
  • 180g (9 tbsp) butter, chilled and cubed
  • 2 egg yolk
  • 4 tbsp water

For the filling:

  • 1 x 400g good quality mincemeat (I used Tesco Finest, which was delicious!)
  • 1 Braeburn (or similar) apple, roughly chopped
  • 1 satsuma, peeled and roughly chopped
To finish:
  • 1 egg
  • Sprinkle of granulated sugar (around 2 tbsp)

Method:

1. Grease the mini sandwich cake tin or deep muffin tin with butter.

2. Sift together the flour and icing sugar into a large mixing bowl, then stir in the salt, ground ginger and cinnamon.

3. Add the butter and rub into the flour mixture, until the mix resembles breadcrumbs. Add the egg yolks and water and bring the dough together into a ball. Take two-thirds and roll out between two layers of clingfilm until it is a few mm thick. Use a 10cm circular cutter to cut out circles, and gently press these into the tin. If there are any rips, use the spare dough to patch it up. 

4. Place the pastry in the fridge to firm up for around 20 minutes, whilst you prepare the filling.

5. Preheat the oven to 180c (160c)/430c/gas mark 6. 

6. Mix together the chopped apple, satsuma and mincemeat until well combined. Spoon into the moulds - you should get about 2 tbsp of filling into each pie. Place back in the fridge whilst you prepare the rest of the pastry.

7. Roll out the remaining third of pastry until it is a few mm thick. I used a small gingerbread man cutter to cut out little gingerbread men to top each pie. You could do this, or use another cutter like a star, heart, tree, or anything you want really - you could also just do a circle, but it the top is fully enclosed, you need to poke a small hole in the top of the pie to prevent bursting of the pie during cooking.

8. Top the pies with the toppers (gingerbread men, stars etc.). If you want, you can then cut thin strips of the spare dough and used this to line the top of each pie to get a neat edge. If you do this, gently press the strips to seal to the sides of each pie.

9. Beat the egg, and lightly brush over the top of each pie. Bake for around 15 minutes, or until the tops are nice and golden. Once out of the oven, sprinkle over the sugar. Leave to cool for around 10 minutes before taking out of the tins. These are amazing warm but also can be eaten at room temperature.

10. Enjoy!


Gingerbread mince pie
Yum
Print This Recipe:

Sunday, 11 November 2018

Nutty Treacle Tart with Crystallized Sage

Nutty Treacle Tart Slice


This treacle tart is amazing. It's not your classic super sweet golden-syrup filling but contains proper black treacle with brown sugar and plenty of nuts. Deep, rich and satisfying, this will last for several days in your fridge. I topped the tarts with crystallized sage but this is completely optional. The sage is VERY strongly flavoured so don't go eating a whole crystallized leaf at one (unless you like the flavour of soap that is).

Makes one 20cm tart (8 large slices)

Ingredients:

For the pastry:
  • 200g (1 cup) plain flour
  • 120g (1/2 cup + 1tsp) cold butter
  • 2 tbsp caster sugar
  • 1/4 tsp salt
  • 1/2 tsp white wine vinegar
  • 3 tbsp ice-cold water
For the filling:
  • 175g (2 cups) nuts (I used a mixture of walnuts and hazelnuts, but pecans or macadamias would be lovely also)
  • 110g (2 cups) wholemeal bread, crustless
  • 50g (1 cup) bran flakes
  • Zest of one orange
  • 120g (1/3 cup) black treacle
  • 200g (10 tbsp) golden syrup
  • 1/2 tsp salt
  • 1/2 tsp ground cinnamon
  • 2 tbsp butter
  • 100ml (2/5 cup) double cream
  • 2 eggs
For the crystallized sage leaves (optional):
  • 8 sage leaves
  • 1 egg white
  • 2 tbsp caster sugar
Method:

1. If making the sage leaves, lightly whip the egg whites until frothy. Lay the sage leaves on a wire rack and brush each side of the leaf with the egg white. Sprinkle liberally with the sugar and leave to dry. Depending on the temperature/dryness of your kitchen this can take at least 8 hours so it might be best to do this the day before you want to bake the tart.

2. Prepare the pastry by sifting the plain flour into a large bowl, and stir in the caster sugar and the salt. Chop the butter into small chunks (about 1cm cubes) and add to the bowl.

3. Rub the butter into the flour mixture until the mixture resembles fine breadcrumbs.

4. Add the white wine vinegar and ice cold water and bring the dough together into a smooth ball. Try not to overwork the dough - as soon as it forms a ball, stop working. Cover in cling film and place in the fridge and chill for at least one hour (it can stay in the fridge for a few days provided it is well covered).

5. Lay out a piece of clingfilm on your counter and place the chilled dough on top. Cover with another piece of cling film and roll the dough out until it is about 5mm thick.

6. Lightly grease a loose-bottomed 20cm fluted tart tin with butter and dust with flour. Carefully transfer the dough to the tin and press into all of the corners. Leave the overhanging pastry for now. Cover with clingfilm and return to the fridge for at least half an hour.

7. Preheat your oven to 180c (160c fan)/355f/gas mark 4. Line a baking tray with baking parchment (or kitchen foil) and spread out your choice of nuts. Once the oven has pre-heated, roast the nuts for 8-10 minutes (until the nutty fragrance is wafting out of the oven). Set aside to cool.

8. Place a layer of baking parchment on the pastry dough and fill the case with ceramic baking beans, or I tend to use spare flour/rice. Bake for around 20 minutes, or until the sides of the pastry are golden brown.

9. Remove the tart case from the oven and gently remove the baking parchment with the baking beans/flour. Bake for another 8 minutes.

10. Whilst baking the tart case, prepare the filling by pouring the bread, bran flakes, and 100g of the nuts into a food processor, and blitz to a fine crumb. Stir in the orange zest.

11. In a small saucepan melt together the butter with the golden syrup and treacle, until the butter has melted and the syrup has become very loose.

12. Pour the syrup mixture over the crumbs, and combine. Add the two eggs and double cream and whisk until smooth. Finally, roughly chop the remaining 75g of the nuts and fold these through the filling.

13. Once the tart has finished cooking, remove from the oven. Trim off any excess pastry overhanging the tart case, and then carefully pour over the filling. Return to the oven for 18 minutes until it has just set.

14. Remove from the oven to cool for around 20 minutes, if you want to serve the tart warm (with some ice cream perhaps). This tart also tastes great at room temperature.

15. When ready to serve, top the slices with a crystallized sage leaf (if using).

16. Enjoy!

Nutty Treacle Tart Slice
Yum
Print This Recipe:

Monday, 8 October 2018

GBBO 2018 Week 6 - Pastry - Chicken Curry Banquet Pie

 Chicken Curry Pie Slice

Chicken Curry Pie

Now, I'd be the first to pipe up and mention how I never make savoury food. Never is an exaggeration, but only a slight one in comparison to how many sweets I bake. It's an area I lack confidence in, so when this week's GBBO had a showstopper challenge of banquet pies, where the pies couldn't be baked in a mould, I wanted a go!

Ruby's chicken curry pie, with turmeric hot water crust pastry, a completely home-made chicken curry and spiced rice, looked delicious, and I was really happy to find the recipe :)

I only made a few tweaks, and sadly, did cook my pastry for a little too long - I even reduced the time the recipe stated - so lesson learnt, after 45 minutes, check the pie often so it doesn't catch! Still, even with the browner bits, the pie tasted amazing, and works really well for lunch as well as dinner :)

Makes 1 big pie (easily serves 6-8)

Ingredients:

For the chicken curry:

  • 225g (1 cup) new potatoes, quartered
  • 1 tsp ground cardamom
  • 2cm cinnamon stick  
  • 1 tsp black pepper
  • 1 star anise  
  • 2 1/2 tsp ground cumin 
  • 4 cloves 
  • 2 tbsp coconut oil 
  • 2 bay leaves 
  • 350g (3 & 1/3 cups) onions, roughly chopped 
  • 1 heaped tsp ginger & garlic paste 
  • 1 heaped tsp hot chilli powder 
  • 1 heaped tsp ground coriander 
  • 1 heaped tsp ground turmeric 
  • 1 1/2 tsp garam masala  
  • 250g (1 & 1/4 cups) tomatoes (I used plum tomatoes), chopped 
  • 2 tbsp tomato purée  
  • 2 tsp salt, plus extra to taste 
  • 900g (around 8 cups) diced chicken breast
  • 1 bunch of coriander, chopped 
  • 1 1/2 tbsp chopped root ginger 
  • 50g (1/4 cup) frozen spinach leaves 

For the rice filling:

  • 1 tbsp coconut oil  
  • 25g (2 tbsp) sliced onion 
  • 1 1/2 tsp salt  
  • 1 1/2 tsp garam masala  
  • 2 tsp ground coriander 
  • 1 tsp ground cumin 
  • 200g (1 cup) basmati rice, rinsed in cold water  

For the turmeric dough: 

  • 450g (3 cups) plain flour 
  • 100g (2/3 cup) strong white bread flour  
  • 1 tbsp ground turmeric 
  • 200ml (around 4/5 cup) water
  • 1/2 tsp salt  
  • 175g (3/4 cup) lard 
  • 1 egg, beaten, to glaze  

Method:

1. Make the curry. Boil water in a pan and add the potatoes. Cook for 10 minutes, then drain and set aside.

2. Prepare the spice blend by grinding the star anise, cinnamon and cloves in a spice grinder/high powered blender until a fine powder. Stir in the ground cardamom, black pepper and ground cumin.

3. Heat the coconut oil in a large pan and add the spice mix and the bay leaves/ Fry for 1-2 minutes, until they are sizzling. Add the onions and a splash of water, and then cook for about 5 minutes (until the onions have softened).

4. Add the ginger and garlic puree, chilli powder, ground coriander, ground turmeric, salt and garam masala and stir to coat all of the onions in the spices. Cook for another 2 minutes.

5. Add the tomato puree, chopped tomatoes and another splash of water, and then cook for around 8 minutes, checking often that the pan doesn't get too dry. It wants to be fairly dry but I was worried about burning, so added a splash of water now and again to keep the mixture a little wet.

6. Stir in the chopped chicken and cook for a further 5 minutes, stirring regularly to make sure all of the chicken is cooked evenly.

7. Add the chopped coriander, chopped ginger and spinach. Allow the spinach leaves to defrost, stir well, then turn off the heat. Transfer the curry to a large baking tray to cool quickly.

8. Make the rice. In a saucepan (that you have a well fitting lid to!), melt the coconut oil, then fry the onions with the salt, garam masala, ground coriander, and ground cumin for 1-2 minutes.

9. Rinse the basmati rice well in cold water, then add to a saucepan with 350ml water. Cover with a lid and bring to the boil. Simmer with the lid on for 10 minutes, until the water has evaporated and the rice is tender. Pour onto a large baking tray and leave to cool.

10. When the curry and rice have cooled, it's time to make the pie! Preheat your oven to 220c (200f)/430f/gas mark 7. Grease the base of an around 28cm pizza dish (or a large enough square dish to fit a 28cm circle on), and line with baking parchment.

11. Make the pastry. Sift together the plain flour, strong white bread flour and turmeric. Meanwhile, pour the water, lard and salt into a saucepan and place on a medium heat.

12. Heat the water/lard/salt until all of the lard has melted and the mixture is bubbling. Take off the heat and pour over the flour mix.

13. Carefully (as at first it will be very hot), bring the dough together with your hands/a wooden spoon (depending on how hot the dough is). Take a third of the dough.

14. Line your surface with clingfilm, and place the 1/3 dough on it, Cover with another layer of film, then roll out until it is bigger than the base of the pizza dish/a 28cm circle. Use a template to evenly cut a 28cm circle, and place the offcuts back with the remaining unrolled dough.

15. Take the top layer of clingfilm off, and then flip onto the prepared tray. Remove the base layer of clingfilm.

16. Spoon the rice on the pastry circle, leaving a 2cm rim around the edge. Spoon over the curry - use a slotted spoon if there seems to be a lot of liquid. Use your hands to mould into a dome.

17.Reserve 100g of the remaining dough, and then roll the remaining dough out as before until it is around a 35cm circle. Carefully transfer over the curry mound, and seal to the dough base. Brush the entire pie with egg wash.

18. Roll the remaining dough out until it is about 35cm long and 5cm wide. Cut into 6 long ribbons, and make two three-strand plaits, and stick to the rim of the pie. With any remaining pastry cut out whatever shapes you like - I went for hearts and people, but it's up to you :)

19. Brush the whole pie (including the decorations) with more egg wash. Bake for 45 minutes.

20. Turn the heat of the oven down to 180c (160c fan)/355f/gas mark 4. Cook for 15 minutes. Check the pie, covering it with foil if it's browning very quickly. Cook for around another 15 minutes until the pastry feels crisp and is golden all over.

21. Leave to cool for a few minutes before serving.

22. Enjoy!

Chicken Curry Pie Slice
Yum
Print This Recipe:

Tuesday, 6 February 2018

Chocolate Orange Caramel Tartlets (Gluten-Free, Refined Sugar-Free, Vegan)

Gluten-free refined-sugar-free chocolate orange tartlets


I'm getting back into healthier baking and found a few interesting ideas I really wanted to try out. The inspiration for these tartlets came from Livia's kitchen, an amazing food blog I can't believe I hadn't heard of previously! She had a recipe for a chocolate orange tart, which is refined sugar-free, gluten-free and vegan. As I'm training for a big race and am trying to eat cleaner, I adapted the recipe to make it a little lower in calories and sugar. For example, I cut down on the sugar content by making the caramel layer a little thinner, as well as leaving out the coconut oil (I didn't miss it!), and adapting the chocolate topping. The flavour is so intense you don't need much, so these tartlets are a perfect handheld treat.

I used a loose-bottomed 12 hole sandwich tin from Lakeland. If you don't have one of these, you could use a standard cupcake or muffin tin.

Makes 12 tartlets.

169kcal per tartlet

Ingredients:

For the base:

  • 80g (3/8 cup + 1 tbsp) dates (pitted)
  • 75g (3/5 cup) ground almonds
  • 65g (2/3 cup) finely chopped walnuts
  • pinch of salt

For the caramel filling:

  • 150ml (2/3 cup) orange juice
  • 175g (1 cup) dates (pitted)
  • Zest of one orange
  • pinch of salt


For the topping:

  • 2 tbsp cocoa powder
  • 15g (1 tbsp) shelled and skinned peanuts
  • 100ml (2/5 cup) skimmed milk (or use a soy/nut alternative if you'd like the tartlets to be dairy-free and vegan)
  • 80g (3/8 cup + 1 tbsp) dates (pitted)


Method:

1. Preheat the oven to 180c (160c fan)/355F/gas mark 4. Lightly grease the base and sides of each well in the cake tin/muffin tray.

2. To make the base, blitz the dates in a food processor/high-power blender until smooth. Add the salt, ground almonds and walnuts, and blitz again until you have a slightly sticky dough.

3. Evenly divide between the tartlet moulds, pressing into the base and sides. Try to get the crust as thin as possible, around 2-3mm is ideal. You can use your fingers or the back of a teaspoon to press.

4. Bake in the oven for 5 minutes (the tartlets will be starting to turn golden on the edges). Take out of the oven and leave to cool.

5. Make the caramel by blitzing together the dates and orange juice until smooth. Stir in the salt and orange zest.

6. Evenly divide between the tartlet cases. They should be filled close to the top, but not overflow.

7. To make the topping, blitz the last batch of dates with the peanuts. Add the milk and cocoa powder and blitz until smooth. It will be fairly runny. Top each tartlet with the chocolate mixture and gently smooth over.

8. Bake in the oven for 10-12 minutes, or until the chocolate layer feels firm but not too hard. Remove from the oven and set aside to cool.

9. Once cool remove from the tin and place in the fridge for at least half an hour before serving.

10. Enjoy!

Gluten-free refined sugar-free vegan chocolate orange caramel tartlets

Yum
Print This Recipe:

Tuesday, 24 October 2017

GBBO 2017 Week 8 - Cumberland Rum Nicky

Cumberland Rum Nicky Slice with Rum Butter

Cumberland Rum Nicky with Rum Butter


This week on the Great British Bake Off was entitled "Forgotten Bakes", which basically meant dishes our Grandparents might remember. The signature challenge was to bake Clangers - suet pastry enclosing sweet AND savoury fillings. My boyfriend vetoed my making this - he said it was too weird...however I will probably go against this at some point for funsies.

The showstopper challenge used elaborate cake moulds to make Victorian centrepieces. As pretty as they were, I wasn't willing to spend up to £50 on a cake tin, so I gave this a miss.

However, the technical challenge was very intriguing. The Cumberland Rum Nicky is, as its name suggests, rum-flavoured. The filling is rum soaked dried fruits (including dates and crystallized ginger, both of which I love!), encased with sweet shortcrust pastry and a pastry lattice. For this lattice, I followed Steven's approach, which I'll do my best to describe! I found it a lot simpler than the classic basketweave approach.

For the pie dish, I used a ceramic pie dish, which was about 20cm across. 

I also made the rum butter traditionally served with this pie. If you love rum, you will love this (it reminds me of buttercream), but it is very alcoholic! If you're not a rum adorer, I'd recommend serving this with some pouring cream or ice cream, if warm. The pie is nevertheless delicious with no extra toppings. It reminded me of a mince pie, with the flavour (but NOT the alcoholic burn) of rum. The pastry held together really well, and it held a nice slice. I will definitely be making this again :) 

Makes one pie

Ingredients:

For the filling:
  • 250g (1 &1/2 cups) dried dates, pitted and coarsely chopped
  • 100g (3/5 cup) dried apricots, coarsely chopped
  • 50g (1/3 cup) crystallised ginger, finely chopped
  • 50ml (3 tbsp and 1 tsp) dark rum
  • 50g (1/4 cup - 1 tsp) soft dark brown sugar
  • 50g (1/4 cup) butter, cut into 2cm cubes

For the sweet shortcrust pastry:
  • 200g (1 & 3/5 cups) plain flour
  • 2 tbsp icing sugar
  • 100g (1/2 cup minus 2 tsp) unsalted butter, chilled and cut into 2cm cubes
  • 1 egg (for the pastry dough) + 1 egg, beaten (to glaze)
  • 1 tsp lemon juice
  • 2 tbsp very cold water

For the rum butter:
  • 100g (1/2 cup minus 2 tsp) unsalted softened butter
  • 225g (1 cup plus 1 tsp) soft light brown sugar
  • 75ml (1/3 cup) dark rum

Alternatively, serve the pie with:
  • Custard
  • Vanilla ice cream
  • Pouring cream

Method: 

1. Prepare the filling. Pour the dried dates, apricots, finely chopped crystallized ginger, rum and sugar into a mixing bowl. Stir, then set aside whilst you prepare the pastry. 

2. To make the pastry, stir together the flour and icing sugar in a bowl. Add the diced butter and rub in with your fingertips until the mixture resembles fine breadcrumbs.

3. Make a well in the centre of the flour, and add the egg, lemon juice and water. Use your hands to work the liquid into the flour, and gently knead the pastry into a ball. Wrap well in cling film and refrigerate for at least 15 minutes, to rest the pastry. 

4. Preheat the oven to 180C (fan 160C)/355F/Gas mark 4. Divide the dough into 2 pieces roughly one third and two thirds. Place the one-third of pastry back in the fridge (covered in cling film). Lay out a piece of clingfilm on your surface and dust lightly with flour. Place the two-third piece of dough onto the clingfilm. Cover with another layer of clingfilm, and roll out to about 1/2cm thickness, or until it is big enough to cover the base and sides of a 20cm (or whichever size you're using) pie dish. 

5. Remove the top layer of clingfilm. Flip the pastry into the pie dish, and remove the bottom layer of clingfilm. Use a little excess pastry to gently tease the pastry down into the corners of the tin. Trim off any overhanging pastry. Place in the fridge to chill for 15 minutes.

6. Spread the filling in the pastry case and dot with butter. 

7. Roll out the remaining pastry until it is around 1/2cm thick, or is big enough to cover the top of the pie. Trim to an even square. To make the basketweave, mark along two opposite sides of the pastry every 2.5cm (1 inch). Hold a ruler between the first two markings, and cut lines 2.5cm (1 inch) long, leaving a 2.5cm (1 inch) gap between the cuts. 

8. Move onto the next two markings, and this time, leave a 1.25cm (1/2 inch) gap before the first cut. Slice lines 2.5cm (1 inch) long, leaving a 2.5cm (1 inch) gap between each cut (so that it is offset against the first row of cuts). For the third set of markings, mark as in step 7 (and so on, alternating the cuts). Once you reach the end, gently tease your hands under the pastry and stretch out the holes, creating the basketweave. 

9. Dampen the rim of the pastry in the tin with a little water, and then invert the lattice from the clingfilm onto the tart. Press the ends of the lattice strips to the pastry rim to secure (I'll admit, mine could have been a bit better at this stage!). I used a little excess pastry to twirl around the rim of the pie, but that isn't necessary. Brush with the beaten egg.

10. Bake the pie for 15 minutes. Turn the oven down to 160C (fan 140C)/320F/Gas mark 3 and bake for a further 20 minutes.

11.  For the rum butter, use an electric hand whisk to beat together the butter and sugar until light and fluffy. Slowly add the rum and beat for at least five minutes (it will still be a bit grainy!), until it is much lighter in colour. 

12. Serve the tart warm or cold, with a spoonful of butter/cream/ice cream.

Cumberland Rum Nicky Slice with Rum Butter

Yum
Print This Recipe:

Saturday, 21 October 2017

GBBO 2017 Week 6 - Blue Cheese, Squash and Spinach Pie

GBBO Blue Cheese, Squash and Spinach Pie

GBBO Blue Cheese, Squash and Spinach Pie Whole

My boyfriend was in charge of making this pie following pastry week on the GBBO. This is his post, so I hope you enjoy it :)

This is based off Sophies four seasons pies from GBBO 2017 but makes one large pie instead of 4 smaller ones. This pie is not quick as a few of the ingredients need to be made separately before being combined. If you are looking for a quick and easy recipe you might prefer this : Game Pie, or Pork Pies with Chicken & Apricot.

Ingredients:

For the Pastry:
• 500g plain flour
• quarter teaspoon of salt
• 250g unsalted butter
• 3 medium egg yolks
• 120ml cold water
• 1 medium egg for glazing

For the Filling:
• 1 medium butternut squash (approx 600-800g once peeled, de-seeded and cubed)
• 3 tablespoons olive oil
• 1 teaspoon cumin
• 1 teaspoon fresh rosemary
• 2 teaspoons honey
• 10g salted butter
• 175g creamy blue cheese (e.g. St Agur, Castello Danish blue)
• 250-300g baby spinach leaves
• 200g Buckwheat
• 2 table spoons crème fraiche
• salt and pepper

Making the Pastry

1. Sift the flour and salt into a mixing bowl, cut the butter into cubes and add it to the bowl. Work the mixture with your hands until the big chunks of butter are gone and the mixture resembles breadcrumbs.
2. Add the Egg yolks then trickle in the water whilst mixing. The dough should become soft but not sticky.
3. Flatten the dough into a fat circle, wrap in clingflim and put into the fridge for 15 minutes.
4. Remove the dough from the fridge, cut in half and return half to the fridge to make the top of the pie later.
5. Roll out the dough into a circular shape and place it into the pie dish. The dough should just come over the sides.
6. Preheat the oven to 200 degrees (fan oven), whilst it is heating up cut a disc of grease proof paper and place it into the pie dish. Add some baking beans to keep the paper in place.
7. Once the oven has reached the correct temperature place the pie onto the middle shelf and leave to bake for 10 minutes.
8. Remove the dish from the oven. Remove the beans and paper. Brush the inside of the pastry with a beaten egg and return to the oven for a further 5 minutes.
9. Take the pie out of the oven and set to one side to cool. (Leave the oven turned on for the next part)

Making the Filling

1. Place the Buckwheat in a  sieve and run under cold water until the water runs clear instead of white.
2. Put the Buckwheat into a pan of water and bring to the boil, let it simmer for 30 minutes (whilst you prepare the rest of the filling.)
3. Peel the Butternut squash and cut into small cubes. 
4. Place the cubes onto a baking tray and add the oil, cumin, rosemary and honey evenly across the tray.
5. The oven should still be turned on at 200 degrees. Place the tray of butternut squash inside for 20-25 minutes. The cubes should be mostly golden brown.
6. Remove the tray and empty into a colander to allow the liquid to drain away. Once drained move into a bowl. Turn the oven down to 160 degrees (fan oven)
7. Melt the butter into a pan and add the spinach. Stir gently until the spinach has wilted. 
8. Remove the spinach and put it into the colander to allow to drain. Once it has cooled squeeze out any excess water using your hands. The spinach will shrink a lot after doing so.
9. Crumble the blue cheese into the bowl with the butternut squash. Add the crème fraiche and then the spinach. Add the buckwheat and mix everything. Finally use some salt and pepper to taste. (If you have used a salty blue cheese you may only need to add pepper)
10. Place the mixture into the pie dish and spread it evenly.
11. Remove the remaining pastry from the fridge. Roll out into a very thin square and cut into ribbons
12. Use the Ribbons to create a pattern on top of the pie. A traditional ribbon weave will work or you can use your imagination.
13. Glaze the top of the pie using egg.
14. Bake the pie for about 25 minutes (until golden brown)

GBBO Blue Cheese, Squash and Spinach Pie

Yum
Print This Recipe:

Monday, 9 October 2017

GBBO 2017 Week 6 - Portuguese Custard Tarts

Portuguese Custard Tarts


Mmmmm pastry - was my thought coming into pastry week. I always love seeing what the bakes come up with, and as two of the challenges were savoury pies, my boyfriend decided to have a go at a shortcrust pie for the first time. His recipe/experience will be up soon. In the meantime, I had a go at the technical challenge, Portuguese custard tarts (known as Pasteis de Nata). I've made them once before, years ago, and I remember them being delicious.

This recipe also intrigued me, because a) it used rough puff pastry, which I've had little success with in the past (I've had more success using proper puff pastry to be honest), and b) the custard recipe is really odd!

I really took my time with the bake, and I'd recommend you do that too - the pastry needs to be really cold to work with, and if you're not in a hurry, those extra few minutes will save you worry when rolling out! It was fairly straight forward though :) The only thing I'd recommend is when you press the pastry into the muffin tins, get the pastry as thin as possible (a few of mine were a little thick on the bottom - still tasted great though!).

The recipe worked really well, and have been really well received. The custard tastes amazing with the hint of lemon and cinnamon, and the pastry came out a treat! I even got the swirl Prue and Paul were talking about:

Underside Portuguese Custard Tarts
If you turn the tarts over, you should see a swirl
similar to this
Makes 12

Ingredients:

For the rough puff pastry:

  • 150g (1 & 1/4 cups) plain flour, plus extra for dusting
  • A pinch of salt
  • 25g (2 tbsp) butter, chilled and cut into cubes
  • 4 - 6 tbsp chilled water
  • 60g (1/4 cup) butter, frozen as a block, then grated coarsely

For the custard filling:

  • 375ml (1 & 3/5 cups) whole milk
  • 45g (3 tbsp) plain flour
  • 2 strips of lemon peel (I used a standard peeler to do this)
  • 1 cinnamon stick
  • 185ml (4/5 cup) water
  • 375g (1 & 2/3 cup) caster sugar
  • 7 egg yolks

Method:


1. Make the puff pastry. Sift the flour into a bowl and add the salt. Rub in the chilled butter using your fingertips until the mixture resembles breadcrumbs. Gradually add the water, a tablespoon at a time, until it forms a dough.

2. Spread a piece of clingfilm over your surface, and place your pastry dough on top. Cover with another piece of clingfilm. Roll the dough into a rough rectangle. Grate half of the frozen butter over the bottom two thirds of the dough. Fold down the top third and fold up the bottom third (as if you are making a leaflet).

3. Turn the folded dough 90 degrees, and roll it out into a rectangle again. Add the other half of the grated frozen butter. Fold down the top third and fold up the bottom third as previously. Wrap the dough in cling film and leave to rest in the fridge for at least 20 minutes.

4. Roll and fold the pastry as in step 3. Turn the dough 90 degrees, roll out to a rectangle again, then fold the top third down and the bottom third up. Wrap the dough in clingfilm and leave to rest in the fridge for at least 20 minutes.

5. Roll the pastry between two sheets of clingfilm to a rectangle measuring 20cm x 30cm (8 x 12 inches). Roll the pastry tightly, from the short side, into a log and cut the log into 12 evenly sized rounds.

6. Pick up one of the pastry pieces. Place one disc into the cup of a 12 hole muffin tin, so that the swirl is facing upwards. swirl-side up. Carefully press the pastry up the sides with your fingers,  working from the centre out, until the pastry just pokes over the top (try to get the pastry as thin as possible, and be very careful - the pastry can rip!). Repeat with the remaining pieces of pastry. Chill for at least 20 minutes.

7. Whilst the dough is chilling, make the custard. Pour the milk into a pan. Sieve over the flour and whisk in. Add the strips of lemon zest and the cinnamon stick, then bring the mixture to a simmer, whisking continuously (so you don't get lumps). Simmer for 2-3 minutes until thick.  Remove from the heat.

8.  Pour the caster sugar into a small pan with the water. Place the pan on a low heat, and slowly melt the sugar. Once you can no longer see any sugar crystals, turn up the heat and boil until the syrup reaches around 112C/234F. Whilst whisking the milk mixture, carefully pour over the boiling syrup.

9. Place the egg yolks in a large bowl and pour over the milk mixture, whisking continuously until combined. Place a sheet of clingfilm over the surface and leave to cool. Once cool, remove the strips of lemon zest and cinnamon stick.

10. Preheat the oven to 240C (220C fan)/ 464F/Gas mark 9. Pour the custard into the pastry cases to around 1cm below the top. Bake in the hot oven for around 12 minutes. At this point, turn the tin around (to get an even bake) and bake for a further 3-5 minutes, until the pastry is golden and crisp and the custard is bubbling with tiny brown spots.

11. Remove from the oven, cool in the tin for around 5 minutes, then gently turn out the tarts and leave to cool on a wire rack.

12. Apreciar!

Portuguese Custard Tarts


Yum
Print This Recipe:

Friday, 11 August 2017

French Chocolate Tart


This tart is inspired by French patisserie, and is ideal for those people who adore dark chocolate - packed full of flavour and the filling is incredibly smooth on the palette. This is the kind of dessert you can make for you/your partner, and not worry about the children wanting to steal any (at least that's how it was described to me). Use the best quality chocolate you can afford, but as long as it's 70%, the recipe will work :)

If you're like me and love orange chocolate, to give the tart an extra delicious note, you could add some orange zest to the filling and pastry.

The pastry can be trickier to work with than normal shortcrust, as it contains eggs and icing sugar. However, the taste makes up for it - the sweetness of the pastry really complements the deep bitterness of the tart filling. This pastry is blind-baked, meaning that it is baked first without any filling in it - this prevents the dreaded soggy bottom.

If you are worried about the soggy bottom, when you take the pastry out of the oven (before adding the filling), you can spread a thin layer of egg white over the case and bake for a few minutes - this adds an extra seal to 100% stop sogginess.

Serve this tart at room temperature, and serve small slices - it's incredibly filling!

To finish off the tart, I chilled some dark chocolate (about 20g) in the fridge until it was really cold. Then use a vegetable peeler or knife to scrape along the top of the chocolate bar. This will make nice scrapings to top the tart off.

The best kind of tart tin to use is a fluted loose-bottomed one, i.e. the bottom can be removed from the tin. Spring-form tart tins tend to brake and not being able to separate the sides from the bottom will make getting even slices very difficult.

Serves 20 (makes one 20cm tart).

Ingredients:

For the pastry (sweet sable):

  • 175g (1 cup) butter, cut into cubes
  • 75g (3/4 cup) icing sugar, sifted
  • 1 egg yolk
  • 250g (2 cups) plain flour
  • Finely grated zest of one orange (optional)


For the filling:

  • 500g (2 & 7/8 cups) 70% dark chocolate, chopped
  • 3 medium eggs
  • 200ml (4/5 cup) 4% (full fat) milk
  • 350ml (1 & 1/2 cups) double cream
  • Finely grated zest of one orange (optional)


To finish:

  • 1-2 tbsp icing sugar, for dusting
  • Dark chocolate shards (see above)
  • Zest of one orange
  • 1-2 tbsp flavourless oil (e.g. sunflower oil)


Method:

1. Prepare the pastry by creaming the butter and sugar together in a mixing bowl, until all of the butter has been incorporated and the mixture is light and fluffy. You could use a hand electric mixer for this.

2. Add the egg yolk, and the plain flour (and orange zest, if using), and either use a food processor or your hands to bring the dough into a bowl. If the dough seems very floury, add a tablespoon of cold water. Once the mixture is a smooth dough ball, cover in clingfilm and refrigerate for 30 minutes.

3. Prepare your 20cm fluted loose-bottomed tart case by greasing the base and sides with butter, then dusting with plain flour. Lie a piece of clingfilm on your work surface. Place the chilled dough on the cling film and place another layer of clingfilm on the dough. This allows you to roll the pastry out thin, without needing to add loads of extra flour.

4. Roll the dough out until it is about 1/2cm thick. You can check whether you have enough dough by placing the bottom of the tin over the dough and check there is enough dough to cover the base and an extra 3cm around the base. Once thin enough, remove the top layer of clingfilm. Pick the dough up carefully and flip into the tart tin (so that the remaining clingfilm is on top of the dough. Remove the clingfilm. Press the dough into the sides of the tart tin. Leave the trailing pastry, and trim off after baking.

5. Place back in the fridge for 15 minutes. Whilst chilling, preheat the oven to 180c (160c fan)/355f/gas mark 4.

6. Once chilled, line the tart with some greaseproof paper, and fill with baking beans/rice/flour. Place on top of another tray. Bake for 15-18 minutes, until the sides are golden. Carefully remove the paper and baking beans/rice/flour, then bake for another 5-10 minutes, until the base has gained a little colour and feels firm to the touch.

7. Whilst baking, make the filling. Melt the dark chocolate in a bowl over a pan of simmering water (making sure that the bowl doesn't touch the water!). In another saucepan heat together the milk and double cream until small bubbles are starting to form on the surface of the mixture. Try not to let the mixture boil so much it froths up.

8. Whisk the eggs briefly, then pour the milk/cream over the eggs whilst whisking. Once all of the milk has been added pass the mixture through a sieve onto the melted chocolate, and whisk until the mixture is smooth and a deep chocolate colour. Add the orange zest, if using.

9. Once the tart case is baked, open the oven door. Pour the filling into the tart (it's easiest to leave the tart on the tray. Close the door and then turn the oven off. Leave for 45 minutes until the oven and tart is cool.

10. Remove the tart from the oven, and take out of the tin. Combine the orange zest with the oil.

11. Dust with icing sugar and cut into slices. Top with a little orange zest/oil and chocolate shards, and serve.

12. Enjoy!


Yum
Print This Recipe:

Sunday, 18 December 2016

Eggnog Mince Pies

Custard topped Mince Pie


Custard topped Mince Pie


This week, I decided to vary my classic mince pie recipe, adding a custard layer on the mincemeat, which had been lightly splashed with brandy. It has the feelings of eggnog and mincemeat in a mouthful, and the creaminess of the custard is delicious against the crisp pastry shells. 

You can buy store bought mincemeat or make your own (my recipe for mincemeat is here). 
If these are for kids/alcohol haters, omit the brandy and add something like orange juice instead.

Makes 12 pies

Ingredients:

For the pastry:

  • 190g (1 & 1/2 cups) plain flour
  • 45g (3 tbsp) icing sugar
  • 1/3 tsp salt
  • 3 tsp ground ginger
  • 2 tsp ground cinnamon
  • 90g (4 & 1/2 tbsp) butter, chilled and cubed
  • 1 egg yolk
  • 2 tbsp water

For the filling:
  • 400g (1 & 1/4 cups) jar good quality mincemeat
  • 500ml (2 cups) milk (I use skimmed, but whole milk would give a richer result)
  • 4 egg yolks
  • 70g (1/3 cup) sugar
  • 2 tsp vanilla extract
  • 30ml (2 tbsp) brandy (or orange juice)
  • 1 tbsp corn flour
  • 1 tbsp plain flour
  • Zest of one orange

Method:

1. Lightly grease the base and sides of a 12 cup deep muffin tray.

2. Prepare the pastry. Into a large bowl sieve the plain flour, icing sugar, salt, ginger and cinnamon.

3. Add the butter to the dry ingredients and rub together until the mixture resembles breadcrumbs. Be patient at this point and make sure no large clumps of butter remain.

4. Add the egg yolk and water. Bring the dough together with your hands. Knead lightly into a ball.

5. Roll the dough out between two layers of clingfilm, until it is around the thickness of a pound coin (around 2mm). Cut out 10cm circles (using a fluted cutter) and gently transfer the the muffin tray. Chill for 20 minutes.

6. Preheat the oven to 200c (180c fan)/430f/gas mark 6.

7. Place a heaped teaspoon of mincemeat into each tart case (so that it is between 1/2 and 2/3 full). Bake for 10-12 minutes, until the pastry is lightly golden. Set aside to cool.

8. Once cool, prepare the custard. In a medium saucepan heat the milk with the vanilla extract.

9. In a medium mixing bowl whisk together the egg yolks, sugar, orange zest, corn flour and plain flour until smooth. Once the milk/vanilla mixture is gently simmering, pour over the egg mixture, whisking constantly.

10. Return the eggy mixture to the saucepan, and stir constantly until thickened. This will only take a few minutes. Whisk in the brandy or juice. 

11. Pour into a measuring jug (for easier pouring), and pour the custard on the top of each mince pie, until they are completely filled. Place in the fridge to set for around half an hour.

12. Enjoy cold or warmed :)


Custard topped Mince Pie

Custard topped Mince Pie


Yum
Print This Recipe:

Saturday, 3 December 2016

Classic Mince Pies with A Twist

Star topped Mince Pies


Here's a real classic now that December is upon us. My ultimate mince pies - here I used a little shortcut of shop bought mincemeat, but I jazzed it up with orange, apple and some extra spices. You'd be amazed the difference little touches like that make! Alternatively making your own mincemeat is very straightforward - my recipe is here.
I used a muffin tin to make my mince pies - if you prefer shallower pies, this recipe will make 24 little pies. If you do this, only bake them for 10-15 minutes.

Makes 10 mince pies

Ingredients:

For the pastry:

  • 250g (2 cups) plain flour
  • 160g (2/3 cup) butter or margarine, softened
  • 80g (1/3 cup and 1tbsp) caster sugar, plus extra for sprinkling
  • 1 tsp ground cinnamon
  • Finely grated zest of one orange
  • 1 egg


For the mincemeat:

  • 1 jar mincemeat (store bought or homemade)
  • 1 orange, peeled and the flesh chopped
  • 1 apple (I like a braeburn but any sharp apple will work)
  • 1 tbsp ground cinnamon
  • 1 tsp ground ginger
  • 30ml (2 tbsp) amaretto (optional)


Method:

1. Make the pastry. Simply add all of the ingredients into a mixing bowl, and rub the butter into the rest of the ingredients (this can also be done briefly in a food processor, or by hand). Add a tablespoon of cold water if the mixture is too powdery and isn't coming together into a ball.

2. Using your hands bring the pastry into a smooth ball (where no lumps of butter can be seen). Wrap in cling film and chill for 20 minutes.

3. Preheat the oven to 200c (180c fan)/400f/gas mark 6. Lightly grease a muffin tin - the easiest way to do this is with some spray oil, but a small amount of butter or margarine will work too. Greasing the tin will make your life 1000x easier when it comes to taking the pies out, believe me!

4. Roll out the pastry between two sheets of cling film, until it about 3mm/1/8 inch thick. Use a 9cm circular fluted cutter to cut out 10 circles for the "case" of the pies. Carefully place into the muffin tin, and trim off any excess pastry with a knife.

5. Make your filling. Mix the mincemeat, chopped orange, apple, cinnamon, ginger, and amaretto, if using, until the segments of orange and apple are evenly distributed throughout the mincemeat.

6. Fill the pastry cases with the mincemeat, so that it fills three quarters of the case. 

7. With the remaining rolled out pastry, cut out stars or other christmassy shapes, and place on the mincemeat filled cases. Sprinkle with caster sugar, and bake for 15-20 minutes, or until the sides of the pastry are lightly browned.

8. Leave to cool for around 5 minutes before taking out of the tins - the easiest way to do this is to gently press a knife down the side of the pie, releasing it from the tin. The pie should then pop out easily.

9. These are AMAZING served warm with a little cream, but also delicious at room temperature :)

10. Enjoy!

Star Topped Mince Pies

Yum
Print This Recipe:

Sunday, 30 October 2016

GBBO 2016 Week 10 - Chocolate, Plum and Amaretto Tarts

GBBO Individual Chocolate Plum Amaretto Tartlets


This week was the final of the Great British Bake Off! The showstopper was insane, with the bakers having to make 49 bakes. One of these were fruit tartlets, which  I decided to have a go at. As we're in the midst of autumn, it seemed wrong to do a summer fruit tart so instead I gave the tart more seasonal flavours with roasted plums topping a chocolate and amaretto custard, encased in a ginger pastry.
YUM are the only words I can use to describe this tart. 
This recipe makes four tartlets, but the recipe is easily doubled if you have enough tartlet tins.
Also, if you have left over pastry, it freezes brilliantly (raw) - just leave it to fully defrost prior to using.
You will need individual 10cm fluted tartlet tins with removable bases.

Ingredients:

For the pastry:
  • 125g (1 cup) plain flour
  • 30g (2 tbsp) icing sugar
  • 1/4 tsp salt
  • 2 tsp ground ginger
  • 1 tsp ground cinnamon
  • 60g (1/4 cup) butter, chilled and cubed
  • 1 egg yolk
  • 1 & 1/2 tbsp water


For the custard:
  • 2 egg yolks
  • 250ml (1 cup) milk
  • 70g (1/3 cup) caster sugar (or brown sugar for a more caramel hit)
  • 3 tsp cornflour
  • 3 tsp plain flour
  • 30g (2 tbsp) dark chocolate (at least 50% cocoa solids), roughly chopped
  • 40ml (2 & 1/2 tbsp) amaretto

For the plums:
  • 2-3 plums, destoned and sliced
  • 50g (1/4 cup) brown sugar
  • 2 tbsp honey
To finish:
  • 10g dark chocolate

Method:

1. Prepare the pastry. Into a large bowl sieve the plain flour, icing sugar, salt, ginger and cinnamon.

2. Add the butter to the dry ingredients and rub together until the mixture resembles breadcrumbs. Be patient at this point and make sure no large clumps of butter remain.

3. Add the egg yolk and water. Bring the dough together with your hands. Knead lightly into a ball.

4. Roll the dough out between two layers of clingfilm, until it is around the thickness of a pound coin (2-3mm). Cut into circles around 14cm in diameter (big enough to line the base and sides of a tartlet tin), and place into the tins. Place in the fridge for 20 minutes.

5. Preheat your oven to 180c (160c fan)/350f/gas mark 4.

6. Place greaseproof paper in the base of each tart tin and fill with baking beans. Bake the tarts for 10 minutes.

7. Carefully remove the paper and beans (the beans will be very hot!), and return the tarts to the oven for 3 minutes. Set aside to cool.

8. Make the custard. Bring the milk to a simmer in a medium sized saucepan.

9. Meanwhile whisk together the egg yolks, sugar, cornflour and plain flour until smooth. Once the milk is bubbling, slowly pour the milk onto the egg mixture, whisking constantly.

10. Return to the pan, and cook on a low heat (stirring constantly) until it has thickened enough to coat the back of a wooden spoon (this will only take a few minutes). Take off the heat and add the chocolate and amaretto. Stir until the chocolate has melted.

11. Fill the tartlet tins with the custard and set aside to cool. Place in the fridge to set fully (for at least 30 minutes).

12. Line a baking tray with greaseproof paper and add the plum slices. Sprinkle on the brown sugar and honey and bake for 5-7 minutes, until a little caramel has formed and the plums have cooked through. Set aside to cool.

13. To assemble place the roasted plum slices onto each tart. Grate the remaining dark chocolate over the tarts.

14. Enjoy!

GBBO Individual Chocolate Plum Amaretto Tartlets

Yum
Print This Recipe: