For my mum's birthday I decided to try to make a chocolate cake that looked like a box of chocolates. A difficult task for me as cake decorating is not my strong suit.
I used two different chocolate cake recipes, both of which ended up delicious. Half was made with rapeseed oil, the other half with coconut oil. The coconut oil gave the cake a lovely coconut twang, and I added orange zest to the cake for a lovely orangey note. I filled the layers with a chocolate buttercream and orange curd, and covered the cake in chocolate ganache. I used fondant to cover the cake and made my own chocolate truffles to fill the box.
Although not perfect, I was really happy with the results of the cake. It tasted fantastic and I'd recommend anyone to give it a go.
Makes one 22cm cake
Ingredients:
For the chocolate orange cake:
- 150ml rapeseed or other vegetable oil
- 200g self raising flour
- 60g cocoa powder
- 280g light soft brown sugar
- 200ml buttermilk (or yoghurt)
- 100ml espresso coffee (or strong instant coffee)
- 2 tsp vanilla extract
- 2 eggs
- Zest of one orange
For the chocolate coconut cake:
- 275g self raising flour
- 20g cocoa powder
- 150g caster sugar
- 65g light soft brown sugar
- 25g ground almonds
- 225ml coconut oil, melted and cooled slightly
- 225ml yoghurt
- 3 eggs
For the buttercream:
- 150g butter, softened
- 275g icing sugar
- 25g cocoa powder
- 1-2 tbsp orange juice
For the orange curd:
- 60ml (4 tbsp) freshly squeezed orange juice (about 1 medium orange)
- 2 tbsp freshly squeezed lemon juice (about 1/2 lemon)
- 40g caster sugar
- 2 eggs
- 50g butter
For the chocolate ganache:
- 170ml double cream
- 300g dark chocolate (at least 55% cocoa solids)
For the chocolates:
- 150g white chocolate
- Granite block (for tempering)
To finish:
- 750g fondant icing block
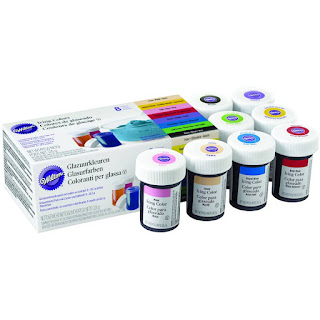
- Pink food colouring
- Royal blue food colouring
- Edible glue (or water)
Method:
1. Preheat the oven to 180c (160c fan)/ 355f/ gas mark 4. Grease and line the base of a 22cm square cake tin with baking parchment.
2. Make the chocolate orange cake. Sift the flour and cocoa powder into a large mixing bowl. Add the light soft brown sugar and orange zest, and using your hands break the sugar up so that no lumps of sugar remain.
3. In a jug whisk together the oil, buttermilk (or yoghurt), coffee, vanilla extract and eggs. Pour into the dry ingredients, and whisk until well combined.
4. Pour the cake mixture into the tin and bake for 25-30 minutes, or until the sides of the cake begin to come away from the tin, and a skewer inserted into the centre of the cake come out clean. Leave in the tin for 10 minutes, then turn out onto a wire rack to cool fully.
5. Make the chocolate coconut cake. Grease and line the base of a 22cm square cake tin with baking parchment.
6. Combine the flour, cocoa powder, caster sugar, brown sugar and ground almonds in a large mixing bowl, and stir to combine.
7. To the bowl add the eggs, yoghurt and melted coconut oil, and whisk until the cake mixture is smooth.
8. Pour into the prepared cake tin and bake for 25-30 minutes until the cake is well risen and a skewer inserted into the centre of the cake comes out clean. Leave the cake in the tin for 10 minutes, then turn out onto a wire rack to cool.
9. Make the orange curd. Find a glass bowl that will comfortably fit on top of a saucepan (without touching the base of the pan). To this bowl add the orange and lemon juice, caster sugar and eggs and whisk together.
10. Cube the butter and add to the bowl. Place the bowl on a pan half-filled with simmering water. Make sure that the base of the bowl doesn't touch the water. Keep the pan on a low to medium heat, and whisk the curd constantly until it has thickened enough to coat the back of a wooden spoon, and if you draw your finger across the spoon an imprint is left. This will take about 10 minutes. Set aside to cool and thicken.
11. Make the buttercream. Beat the butter until really soft, then sift in half of the icing sugar. Beat with a wooden spoon until the icing sugar has been incorporated into the butter. Add the other half of the icing sugar, cocoa powder and orange juice. Beat until smooth and the buttercream is easy to spread. If too thick add a little more orange juice, and if too thin add more icing sugar.
12. Split each cake horizontally into two even slices. Three layers will be used to make the "box" of the cake, and one for the "lid".
13. Split the orange curd into two bowls - one will be used for the cake, the other half for the chocolates.
14. Take one of the layers of the coconut chocolate cake and place on a board that can easily be transported to and from the fridge (for example a flat baking tray). Place a tablespoon of curd on the cake layer, and spread over the cake. Top with a quarter of the butter cream, and spread over the top and sides of the cake layer.
15. Place a layer of the orange chocolate cake on the first layer of cake. Add a tablespoon of curd, and the next quarter of buttercream to the top of the cake, and smooth over the top and sides of this layer.
16. Place the other layer of coconut chocolate cake on top of the cake, and cover with a tablespoon of curd and the next quarter of buttercream. Smooth evenly over the top and sides of the layer, and place the cake in the fridge for 10-15 minutes, until the buttercream is no longer sticky to the touch.
17. To the final layer of orange chocolate cake, cover evenly with the remaining chocolate buttercream. Place in the fridge for 10-15 minutes, until the buttercream is no longer sticky to the touch.
18. Make the chocolate ganache. In a saucepan heat the cream until the cream is starting to bubble. Meanwhile, chop the dark chocolate finely and add to a heat-proof bowl. Once hot, pour the cream onto the chocolate, and stir until all of the chocolate has melted and the ganache is shiny. Set aside a quarter of the ganache - this will be used for the chocolates. Leave for 10-20 minutes until it is thick enough to be spreadable.
19. Take the cakes out of the fridge, and cover the top and sides of the "box" and lid" with the chocolate ganache. Try to be as neat as possible at this stage, and get the sides and top of the box as smooth as possible. I find a palette knife works best for this. Place the cakes back in the fridge for 20 minutes, for the ganache to firm up.
20. Prepare the fondant. Take 150g of the fondant and colour it a light pink - this will be used for the ribbons. Colour the remaining fondant a light blue.
21. Roll the blue fondant out - I find this is easiest to do by dusting a silicon mat with icing sugar, and using a plastic rolling pin. You can use a wooden pin but I find fondant is far more likely to stick to wood than plastic. Roll the fondant until it is about 1/2cm thick. Cut out two squares with sides 22cm long. This will be for the top of the "box" and "lid".
22. Measure the height of the cakes. When I made the cakes, the box was 8cm tall, and the lid 2cm. Cut out four rectangles from the fondant for the "box". These will be 22cm in length, and add a centimeter to the height of the box (for example for my cake the strips were 2cm x 22cm).
23. Cut out strips for the lid sides. These will be around 22cm x 2cm, depending on the thickness of your lid layer.
24. Place the pieces in the fridge to firm up for about 10 minutes.
25. Place a 22x22cm fondant piece on the top of the "box", and smooth over as best as you can. Add the 22x9cm rectangles of fondant to the sides of the box, and smooth around. Place in the fridge for 15 minutes to firm up.
26. Cover the lid with the other 22 x 9cm rectangle of fondant, and the sides with the 2x22cm rectangles). Place in the fridge for 15 minutes to firm up.
27. Roll out the pink fondant until it is around 1/2cm thick. Cut out two strips, 1cm x 26cm. Cut out two rectangles 4cm x 12cm and fold at the centre to turn into two ribbons. Cut two strips 1cm x 7cm, and to one end cut out a triangle (to look like a ribbon). Use half of the remaining pink fondant to make a small oval (about 3cm x 4cm), and the last of the pink fondant to cut out M U M letters.
28. Use edible glue or water to place the 1x26cm rectangles along the centre of the lid, so that they cross in the centre. Place the ribbons on the middle of the cake so that they point outwards into the top two quarters of the cake. Place the two 1x7cm strips on the bottom two quarters of the cake. Place the pink fondant oval over the middle of the cake.
29. Make the chocolates. Melt 100g of the white chocolate in a microwave on high power, mixing the chocolate every 15 seconds until the chocolate has melted.
30. Pour the chocolate onto a granite block, and use a palette knife to spread the chocolate out to an edge of the block. Then bring the chocolate back into the centre of the block. Keep doing this until the chocolate has thickened.
31. Pour the white chocolate back into a bowl, and quickly use a teaspoon to add small amounts of white chocolate to each of the sweet moulds. Spread up the sides of the mould with the spoon - if the chocolate begins to thicken too much, place VERY BRIEFLY into the microwave (at most 10 seconds). Set aside to set - if you have tempered the chocolate well this will only take a few minutes.
32. To each chocolate mould add half a teaspoon of curd, then top with half a teaspoon of ganache - if it has set too firm, heat in a microwave for 10-15 seconds.
33. Melt the remaining 50g white chocolate in a microwave on high power, mixing every 10-15 seconds, until the chocolate has melted. Pour onto the granite block, and repeat the spreading and bring back of the chocolate until it has thickened.
34. Pour the chocolate into a bowl, and spread over the top of each chocolate. Set aside to set.
35. Take the "box" cake out of the fridge, and if you like add further details to the cake, for example trimming around the base of the cake (made with 1x22cm strips of blue fondant). Stick the M U M fondant letters to one side of the cake.
36. Add a few drops to about a tablespoon of fondant, and mix until it is sticky. Place small blobs of fondant on the base of each chocolate, and stick to the top of the "box".
37. Place the lid of the cake on the box.
38. Enjoy!!


